Wednesday, December 16, 2015

Silhouette Collage

 
Original Link

Part 1:Brief Overview
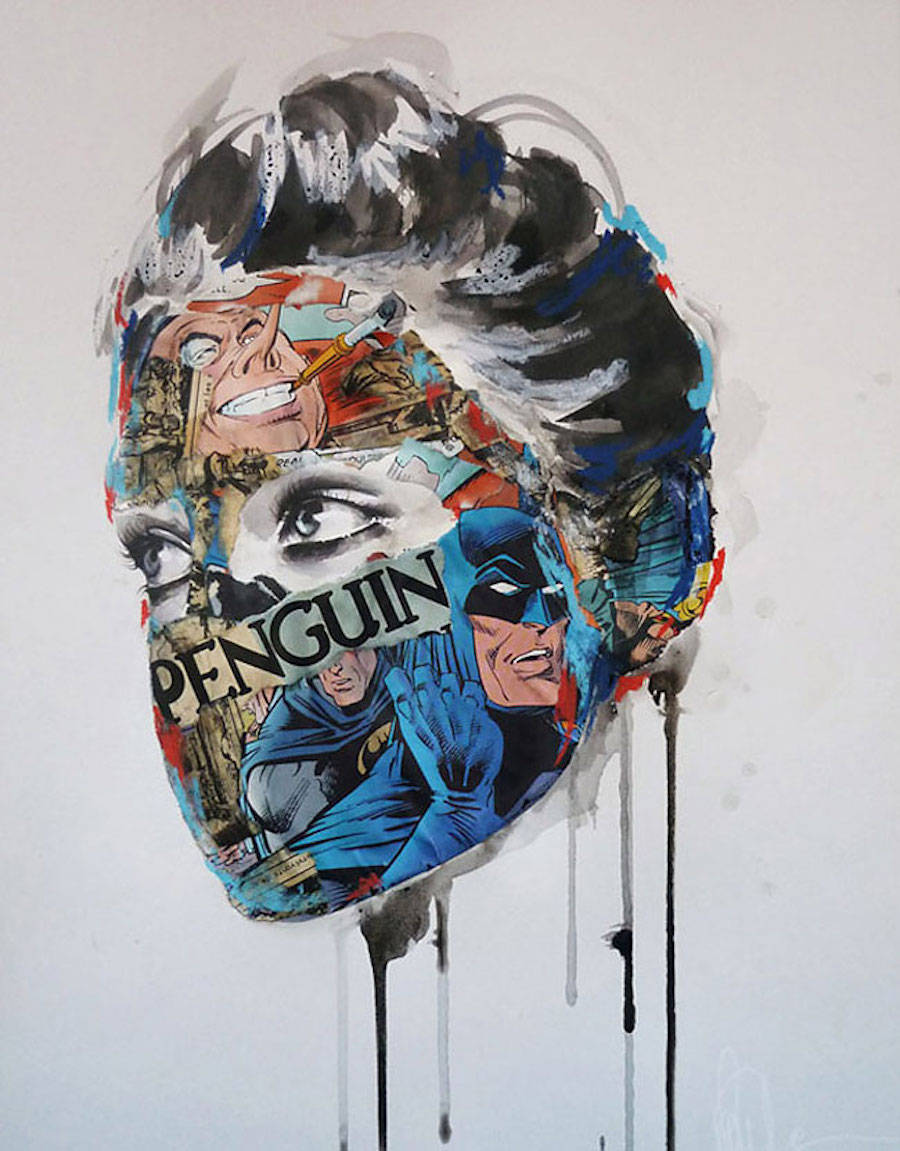
Students will make a collage of their interests within a cut out silhouette of their own head.
Part 2: Sketchbook Activity & Transition
Students will draw or list things that they feel are a pictorial description of their interests and feelings
Part 3: Opening: Looking at and Talking about an Artist’s Image
Students will look at emotional collages/collages meant to convey the personal thoughts or interests of the artist
Part 4: Exploring Materials, Tools, and Techniques
Students will look through magazines and collect images that they relate to.
Part 5: Posing the Open-Ended Problem and Providing the Criteria
Today I want you to: Make a silhouette collage of your interests and emotions

Part 6: Generating Ideas, Making Preliminary Plans
Students will use a projected light on the wall to trace the profile of their face, they can do this in pairs or in groups.  The profile will need to be larger than their actual head.  They will then start moving collage pieces around within the lines of their profile to create an image.

Part 7: Creating the Final Product
Students will glue down their images, cutting them if needed to make them fit.  They will then cut out their profile and glue it to a larger piece of paper in a contrasting color for hanging.  Students will need to write a short explanation about why they chose their different images.

Monday, December 14, 2015

Cultural Fairy Tale

Original Link
Original Link
Students will choose a fairy tale from another country.  They will then research the illustration style that that country or another country in the same time period used.  They will digitally sketch an illustration that matches the style.  They will then stylize it so that it is modern.

Sunday, December 6, 2015

Pop Culture Collage Painting

Outcome: Students will create a self-portrait using their face and pop-culture references to that they relate to.
Original Image Location
 Pre-Lesson: Students will practice painting self-portraits in the week leading up to this activity.  They can start with black and then can use colors as they choose later in their paintings.  Students should end the week with at least 3 self-portraits that show a progress in their understanding of how to paint a self-portrait.  These do not need to be high quality finished pieces.  

Lesson:  Students will paint their self-portrait.  They will need to choose colors that they can use either to convey the details of their portrait or that they relate to personally.  

They will then start collecting and attaching pop-culture or other images cut from magazines, or if necessary printed off the internet.  They will attach these images to their portrait using rubber cement to obtain a clean finish. They will need to choose at least one physical feature that will not be uncovered, it is up to the student to choose if they are accenting this feature due to dislike or because they favor it.

They will need to write an explanation/artist's statement when they are finished that explains their color choices and image choices.  

Assessment: 

Students must explain their concepts in their artist statement
Their work should reflect what their artist statement says
Students should have a completed painting with at least one feature showing on their face and multiple collage references with an explanation for each one.

Sunday, November 29, 2015

Claymation Activity

Students will create a one minute claymation sequence.  They will team up together and will create a stop motion video using clay.  Each team will use their smart phone or tablet with a stop motion app.  They will have three weeks to complete their animation.  They will need to design a storyboard with sketches, draw character sketches, create their clay figures and then shoot their video.

Original Link

Weaving part 3

Basket weaving

Students will weave baskets using rope or reeds.  They will use their understanding of weaving from the two previous weaving activities.  Students will then weave a basket.  They will complete 3 baskets using multiple colors.  They will have to research different basket weaving techniques used by native american tribes and will attempt to use 3 different techniques for their three baskets.

Weaving Part 1

Students will learn the basics of weaving.

They will be given a loom made of tag board/found wood with notches cut into the ends.  They will wind yarn around the notches to create the loom.  They will then learn how to weave the yarn in between the strings.  After they have successfully completed four tight lines of woven fabric they can then choose their own fabric or yarn if they have access to any.  Students must complete a foot of woven fabric made of their chosen materials.


Weaving Part 2

Paper Weaving
This is meant as a secondary weaving activity.  Students can learn to weave using something with less give that requires more coordination.
Roll Newspaper into rolls
Weave newspaper together into basket shape
Start with the bottom of the basket
Roll different shapes of newspaper rolls
Weave newspaper back and forth

Materials:
Newspaper
Painter's Tape